This blog includes:
- What is Azure Kubernetes Service?
- Adding an Azure Kubernetes cluster
- Setting basic information for your Azure Kubernetes cluster
- Scaling in AKS
- Authentication in AKS
- Networking in AKS
- CPU, memory, and container monitoring in AKS
- Tagging your AKS cluster
- Reviewing + saving your AKS cluster
- Configuring kubectl to work with your Azure Kubernetes cluster
Azure Kubernetes Service (AKS) is Microsoft Azure’s managed Kubernetes solution. It competes with both Google Kubernetes Engine (GKE) and Amazon Elastic Kubernetes Service (EKS). AKS has several features that are attractive for users of Microsoft Azure and provides the ability to easily create, maintain, scale, and monitor your AKS cluster. Here are some of the benefits of AKS touted by Microsoft:
Since AKS charges only for compute usage, we can create a test cluster that is relatively cheap to explore some of the features offered by AKS. In order to continue following along you will need to log in to the Azure portal. You will incur some charges by following this tutorial.
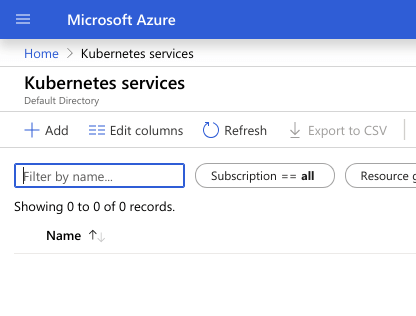
Once you are logged into the Azure portal, use the search bar to search for Kubernetes services, then select Kubernetes services.
Now you should see the Kubernetes Services UI. This is where your AKS clusters will be listed if you have any—otherwise it will be an empty table. To add a new AKS cluster, click the + Add button in the top-left portion of the screen to enter the Create Kubernetes cluster UI.
The first step of the Create Kubernetes cluster UI is to set up all of the basic information for your AKS cluster.
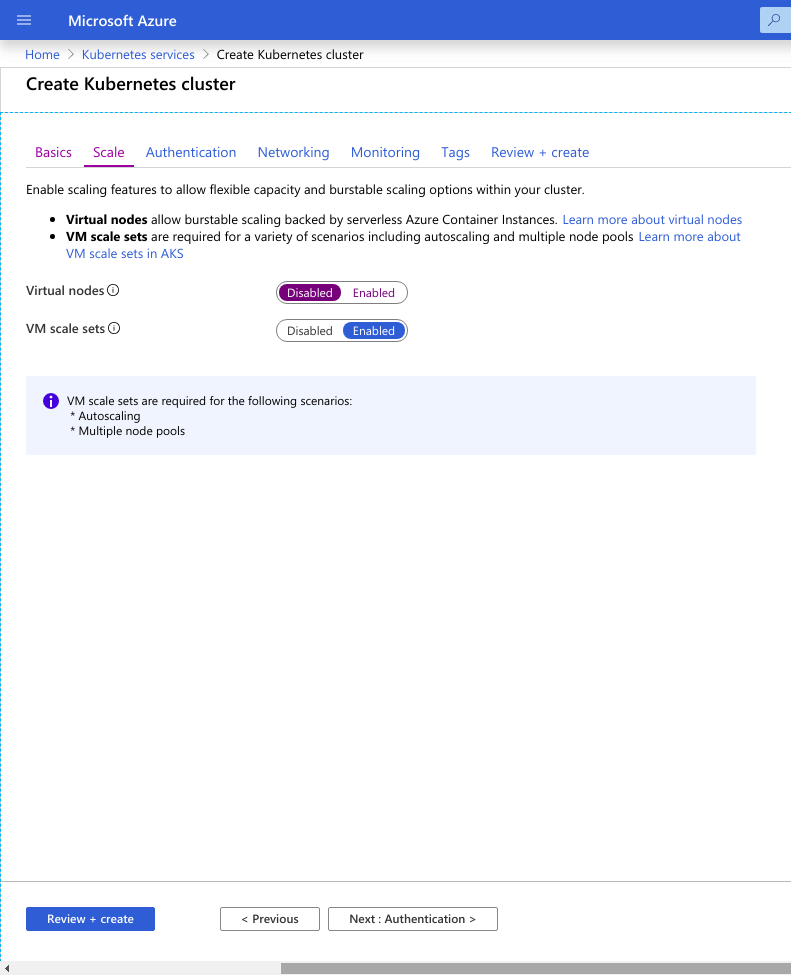
AKS provides some unique features around scaling that could make it an attractive solution for dynamic workloads.
Virtual nodes are a very interesting feature for dynamic workloads. Virtual nodes lets you essentially schedule pods onto nodes that you do not manage and pay per second of execution time. This can speed up scaling time since you do not have to wait for the cluster autoscaler to detect a capacity need and then wait for a VM to launch for the cluster. Virtual nodes are not available in every region that AKS is available in, and the feature requires that your cluster is configured with Advanced Networking. For more information check out the documentation. For our test cluster, we will leave this feature turned off.
VM Scale Sets are the standard scaling option for AKS and do not incur any additional charges. This allows you to manage multiple node pools for your cluster so you can run different-sized instances simultaneously, which can be needed for workloads that have specific resource requirements for some pods, and basic requirements for other pods. This also allows you to set up the cluster autoscaler to add capacity when there is demand based on the running pods.
After you are done choosing the scaling options, click Next: Authentication.
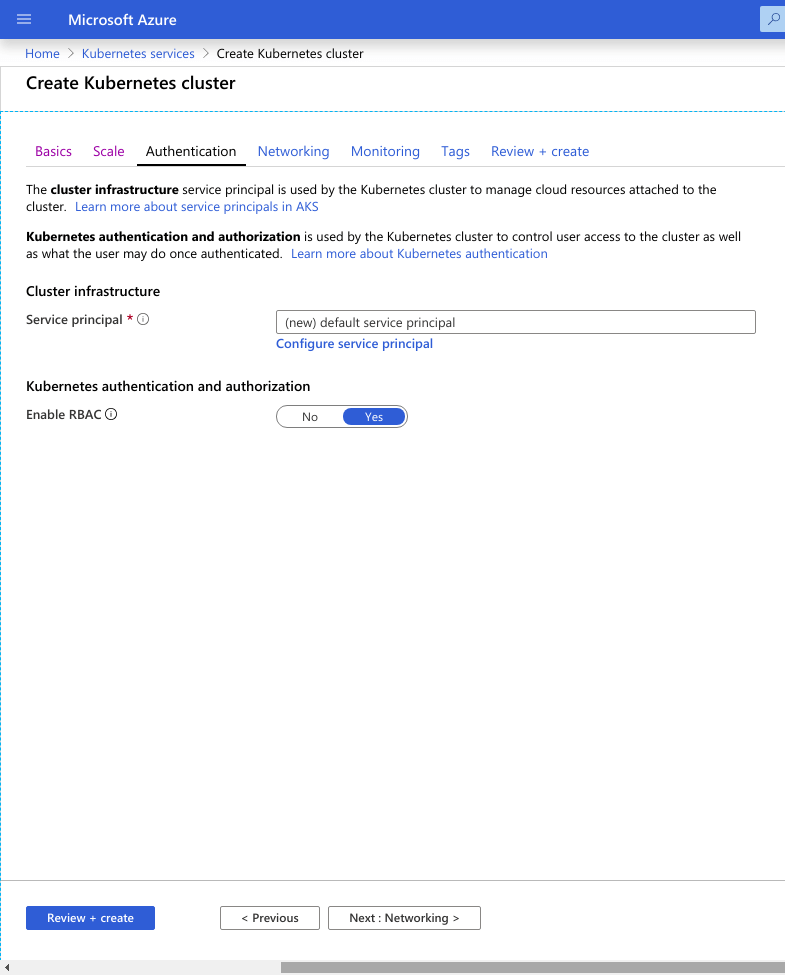
AKS integrates seamlessly with Active Directory to manage AKS cluster access. First you configure the service principal which integrates with AD to delegate access to other Azure resources. You can either select an existing service principal or let Azure create a new one.
Next, you want to Enable RBAC. This allows you to use role-based access control in the cluster to provide granular access to cluster resources. This feature should always be enabled, even for test or dev clusters. Once you are done on this page, click Next: Networking.
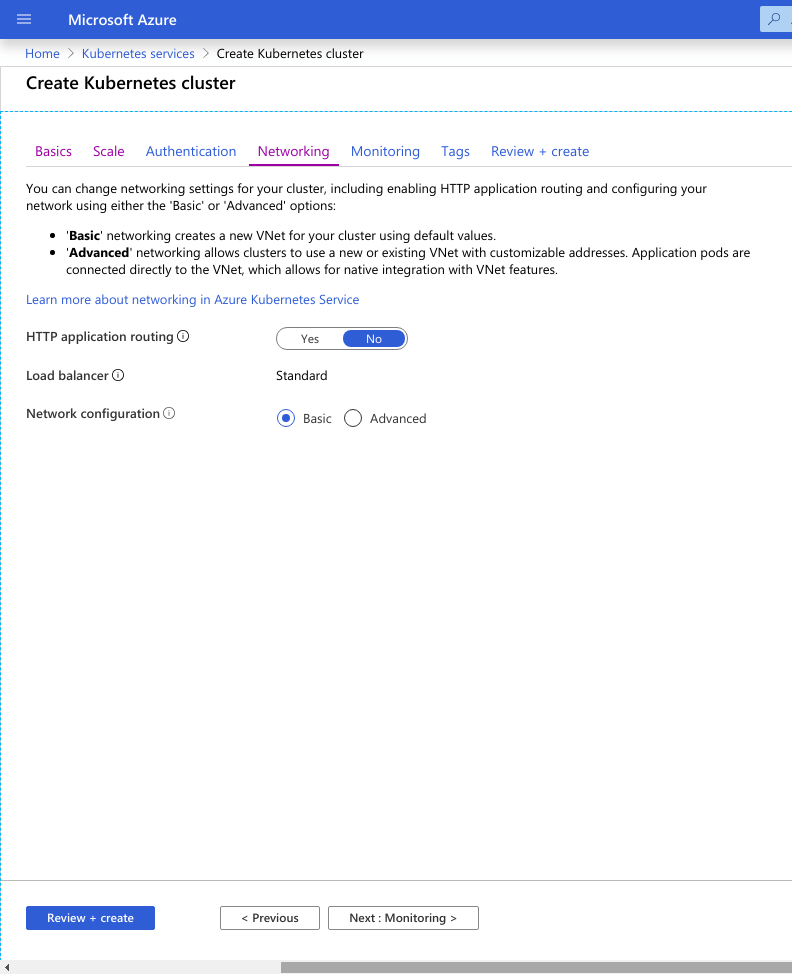
AKS offers several networking options that can speed up development or enable advanced cluster setups.
HTTP application routing allows you to easily access services deployed in the cluster by creating public DNS entries for your applications. This feature is not recommended for production clusters, and I would not recommend it for any AKS cluster. Depending on features that are not production-ready is never a good idea in development. You can enable access to services using an Ingress controller and there is no reason to add cluster-wide general HTTP access to your cluster.
Network configuration has two options: Basic and Advanced. Basic networking will use kubenet as the networking layer for your pods and only your nodes will receive private ip addresses in your vnet. Basic networking does not have any configurable options from the UI, but you can still configure kubenet if you create your cluster from the CLI by following this documentation. Advanced networking is required for virtual node scaling, and uses Azure-CNI for the network layer, providing each pod with a private IP address in your vnet. You can read the Azure CNI documentation for information on configuration, use cases, and comparison to basic networking with kubenet.
For the purposes of this guide we will stick to Basic networking so that we do not have to manage the vnet and subnets ourselves. Click Next: Monitoring to continue to the next step.
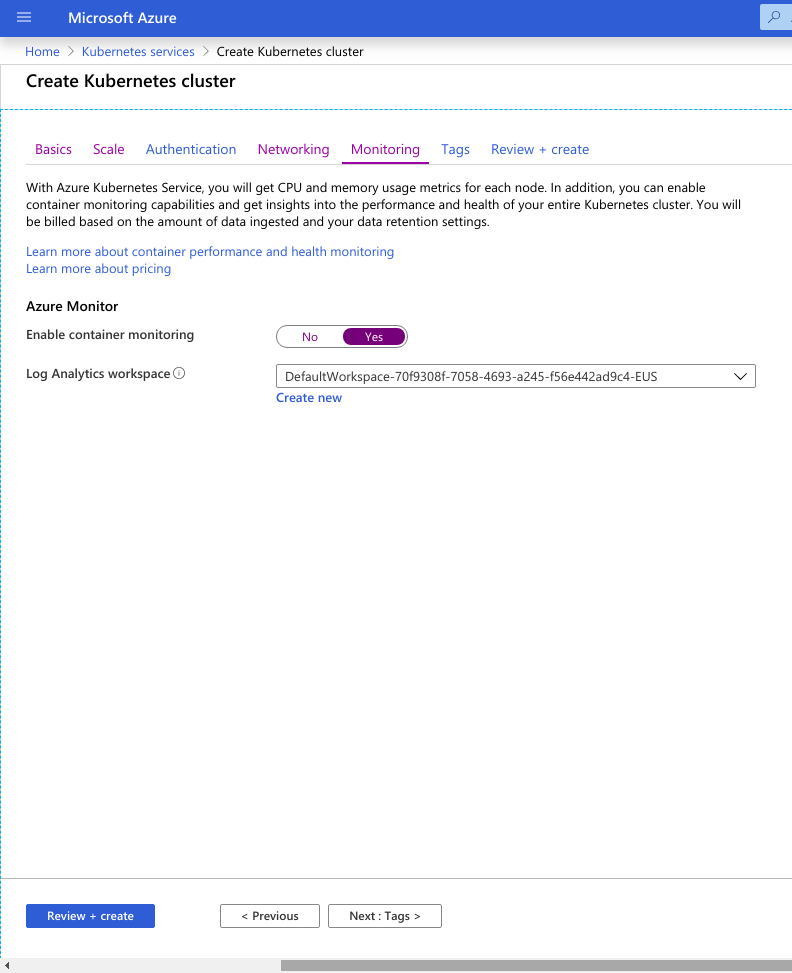
Azure Kubernetes service includes node CPU and memory monitoring at no additional cost. At cluster creation, you can optionally enable container monitoring. Container monitoring sends additional container metrics and logs using Log Analytics, which has fees based on the amount of data ingested. Simply enable container monitoring and then select or create a log analytics workspace to store the AKS data.
With container monitoring enabled you can view the CPU and memory usage per node, controller, or pod. You can view metrics or create alerts with Azure Monitor that are not available otherwise. A Prometheus integration with container insights is also in public beta, which can help close the gap on monitoring for many use cases.
For our test cluster, we will enable monitoring so we can get a sense for the depth of what AKS has to offer. Click Next: Tags to continue to the next step.
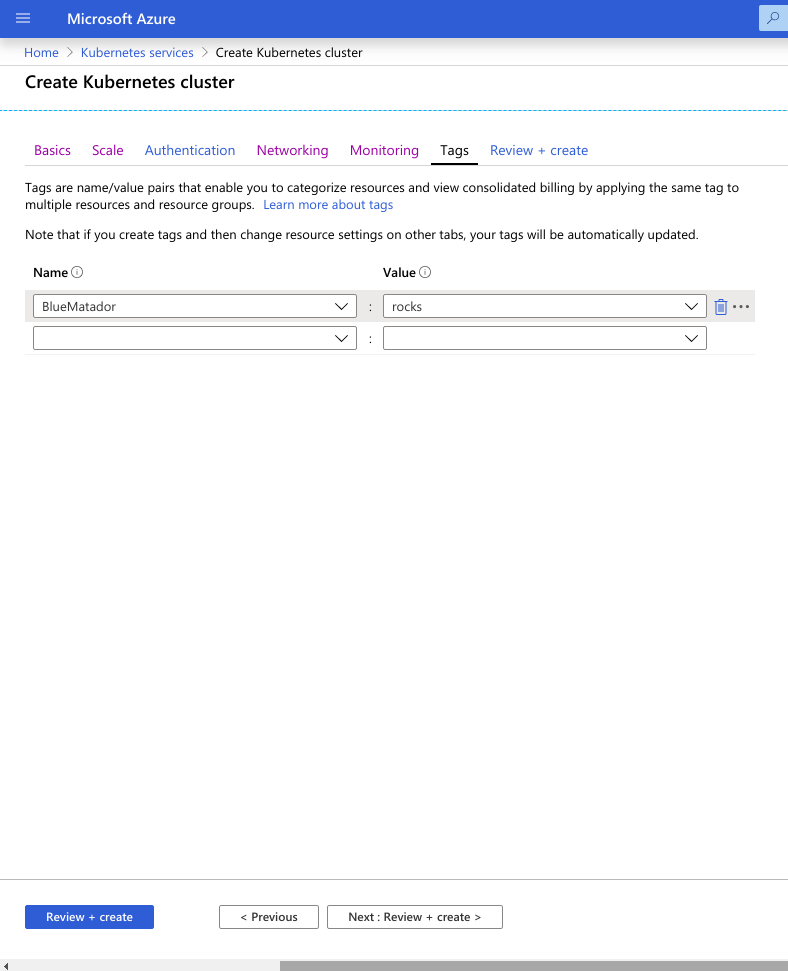
You can optionally tag your AKS cluster. Tags do not apply to the nodes, controllers, or pods inside of your cluster and will have very little effect on your usage of AKS unless your organization uses tags in other Azure services as a way to organize resources by environment or team. Click Next: Review + Create to advance to the final step.
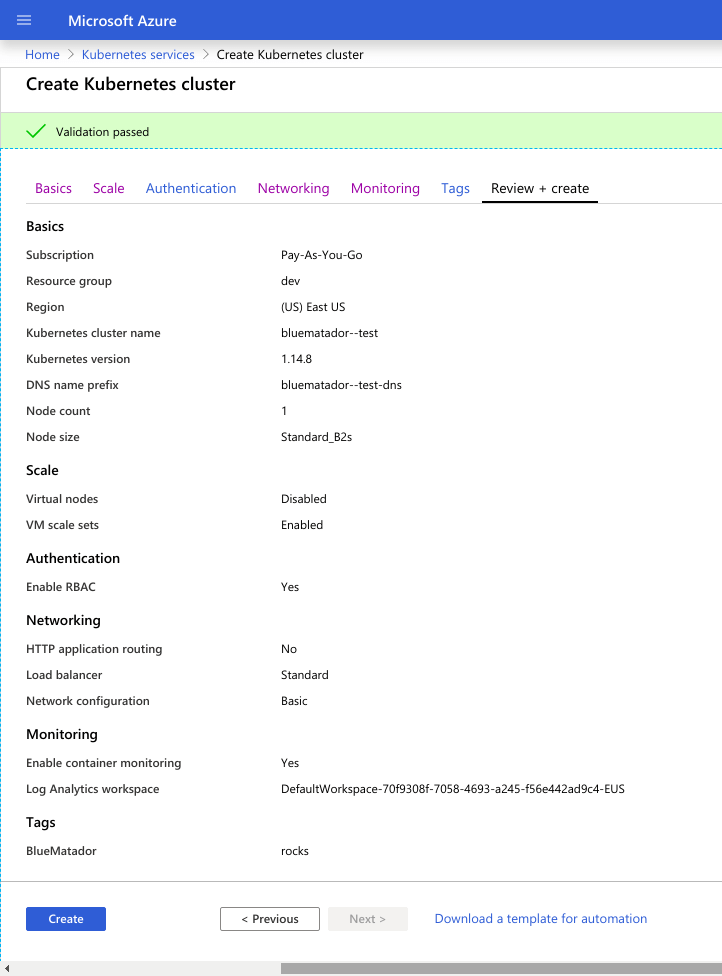
Finally, double-check your settings and resolve any issues brought up in the UI. Once your settings are validated, click the Create button to actually create your AKS cluster. Cluster creation will happen in the background, and can take as long as 15 minutes.
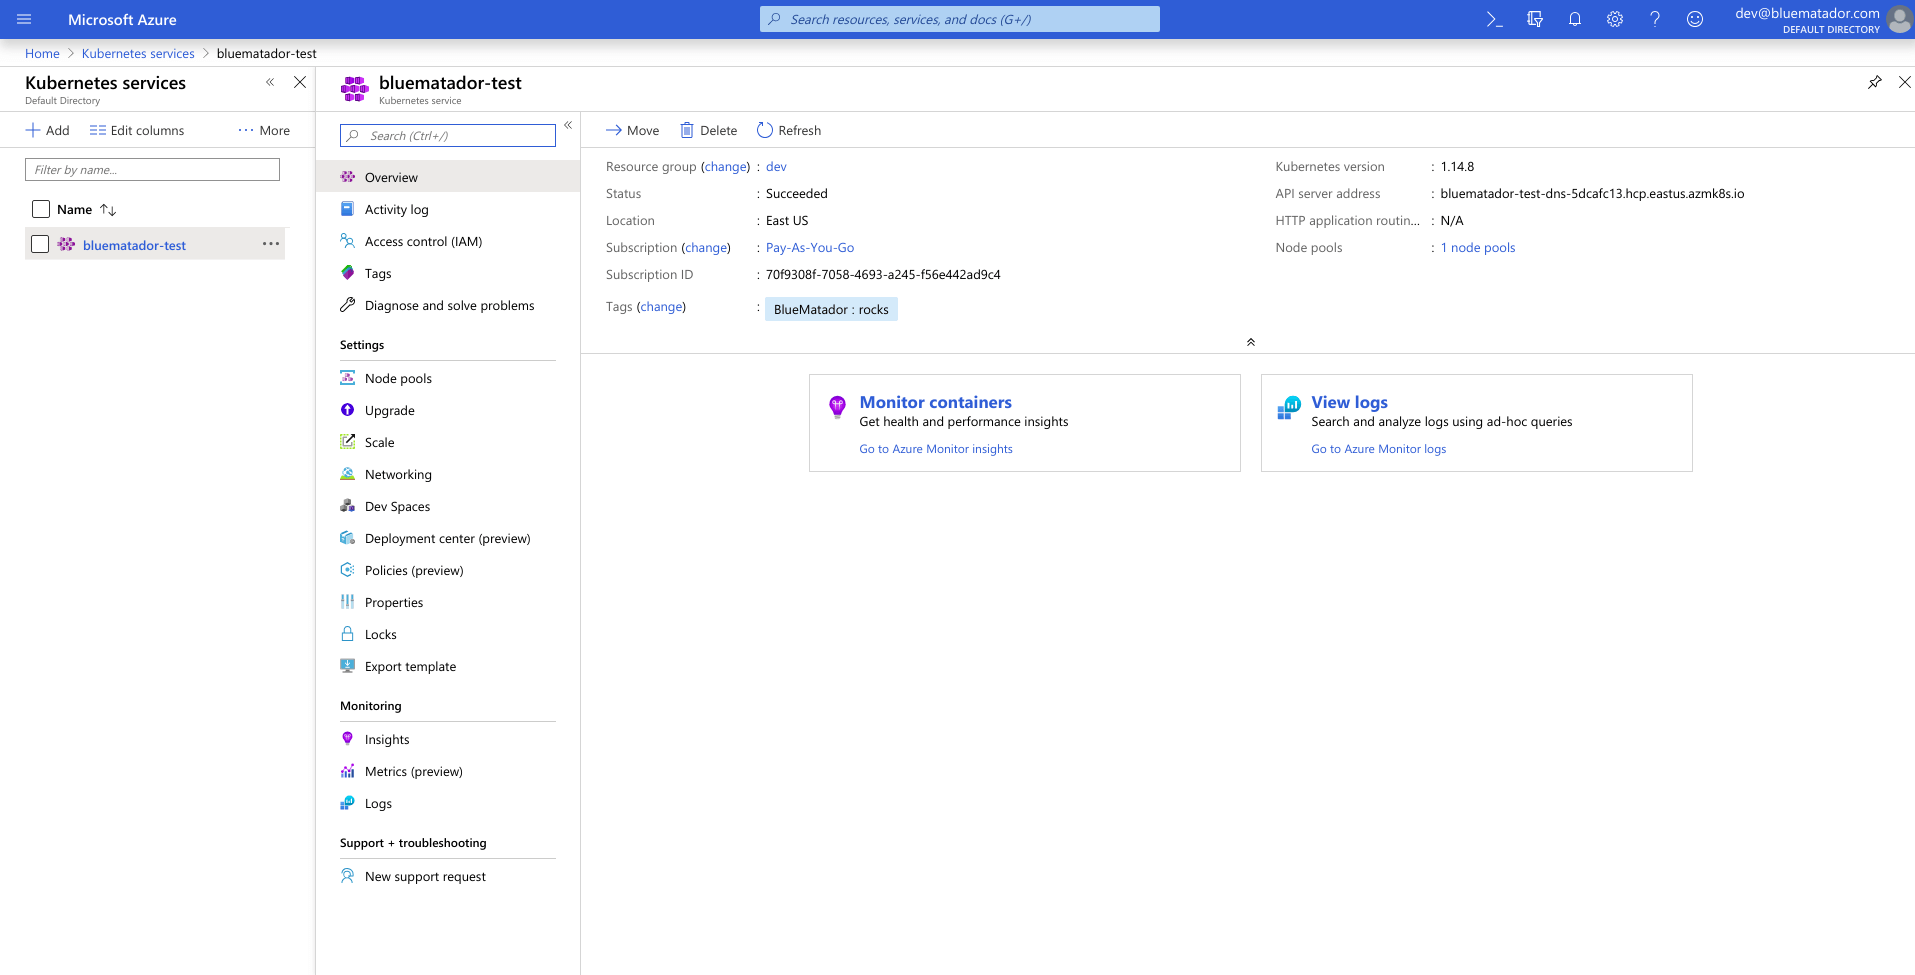
Once cluster creation is done, you can view your cluster from the Kubernetes services list UI.
Now that your cluster is up and running, you will very likely want to configure kubectl to work with your cluster so you can deploy some pods. The Azure CLI provides an easy way to install and set up kubectl for AKS clusters.
First, install kubectl either from a binary or using the Azure CLI.
az aks install-cliNext, use the get-credentials command from the Azure CLI to set up your local kubectl configuration. Replace MyCluster with the name of your cluster and MyResourceGroup with the name of the resource group your cluster is deployed in.
If you have multiple kubernetes clusters in your local configuration, you can specify the optional parameter --context to explicitly set the name of the context that will be created in your kubectl configuration. If you do not specify the context name, it will default to using the cluster name.
az aks get-credentials --name MyCluster --resource-group MyResourceGroup --context MyContextOnce that is done, you can use get nodes to verify it is the correct cluster:
kubectl --context MyContext get nodes
We’ve gone over the high-level features of Azure Kubernetes Service and what it does. We also covered a step-by-step process for creating a new Kubernetes cluster in AKS using Azure portal, and what the options for each step mean. Finally, we quickly went over the commands needed to set up kubectl to work with your new AKS cluster so you can start deploying test workloads to it.
Overall, I find the process of creating a basic AKS cluster fairly straightforward, and the UI covered more options than some of the competing managed Kubernetes solutions. For a production cluster I would highly recommend not using the UI to configure it since changes to the cluster will be hard to track that way, and advanced configurations are not fully handled.
If you are looking for a monitoring solution for Azure Kubernetes Services, consider Blue Matador. Blue Matador automatically monitors Kubernetes for lifecycle events, resource utilization, failed deployments, failed jobs, and more. Blue Matador also monitors other Azure services including Azure SQL, Cosmos DB, Storage Accounts, and Virtual Machines.