 Azure Monitor gathers performance metrics from your various Azure resources and allows you to explore those metrics through visualizations. It also allows you to manually create alerts that will notify you when a metric crosses a predefined threshold. In this blog post, we’ll cover how to create an alert in Azure Monitor.
Why Create Azure Monitor Alerts?
When running a webapp, you will inevitably experience issues that could result in potential downtime. Creating alerts on crucial resources can help you know when issues begin rather than waiting until your users are unable to use your application. If you know the early indicators of impending application downtime, you should create alerts to help you get ahead of them.
Creating Alerts
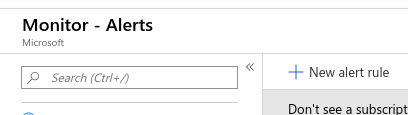
To create an alert in Azure Monitor, first go to the Azure Portal’s Azure Monitor alerts page. Then take the following actions:
- Click on New alert rule.
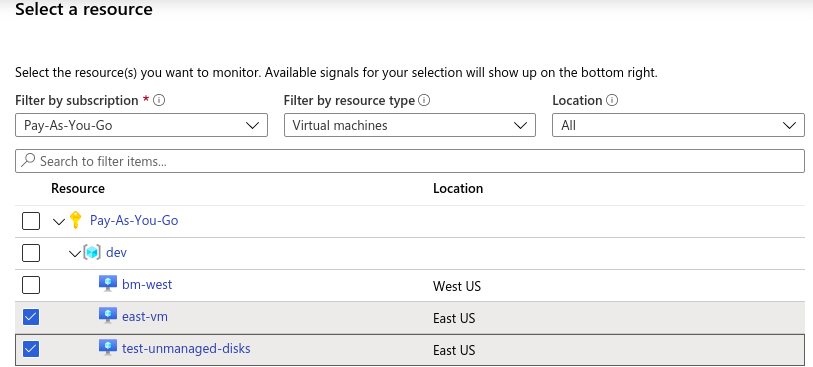
- Select resources to monitor. The panel that pops up allows you to filter by resource type and location. Bear in mind that you can only create an alert for resources that are of the same type and in the same location. If you have resources in other locations, you will have to create additional rules (likely with the same settings) for each other location.
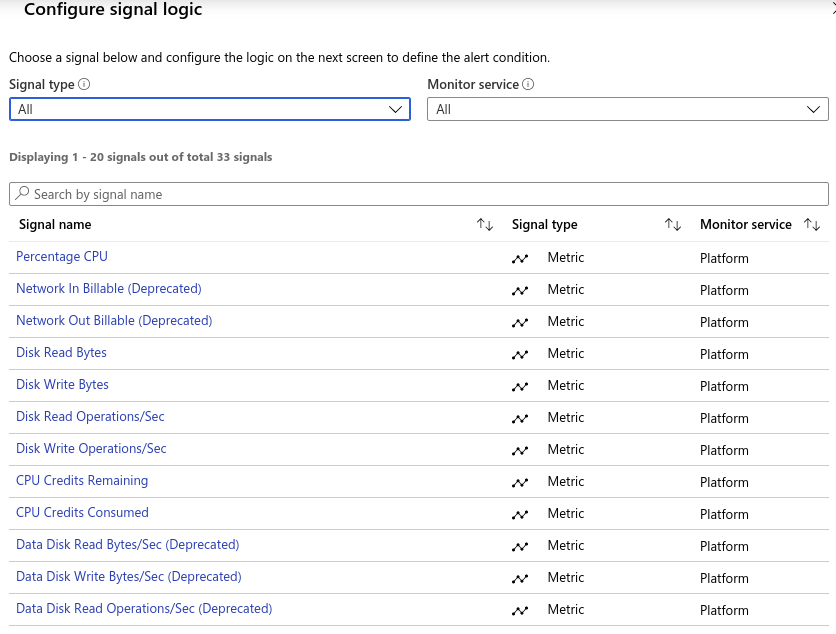
- Next, you’ll add a condition to trigger the alert

- To do so, start by selecting the metric you’d like to monitor.
- Next, set the threshold you’d like to alert on. If you know the specific metric value you’d like to alert on, create a static alert with that threshold. Otherwise, create a dynamic threshold. This will allow Azure to define the threshold based on the historical value of your metric, and can be configured to High, Medium, or Low sensitivity. You’ll also need to select the metric granularity and evaluation frequency for the alert.

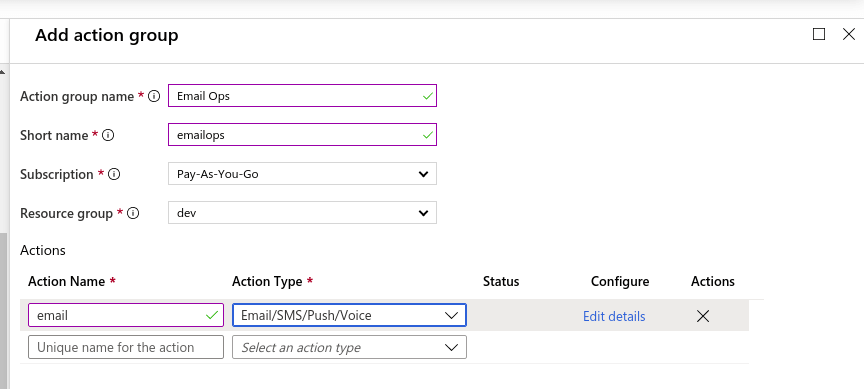
- Add an action group to the alert. This will specify what to do when the alert triggers. Azure allows you to take many actions, including sending notifications, triggering Azure Functions, or calling a webhook.
- Finally, input alert details and save your new alert. This includes setting the severity level for the alert.

Next Steps
Congratulations! You’ve now created an Azure Monitor alert for your resources! At this point, you’ll have to repeat the process for each set of resources, locations and metrics that you’d like to monitor.
Unfortunately, this can get tedious, and it’s easy to miss resources or forget to add an alert later when you add more resources. You also sometimes don’t know what metrics are important to watch. Luckily, we’ve built Blue Matador to automatically watch all your resources and warn you when anything is anomalous so you can focus on what’s most important. Take the manual work out of monitoring your Azure resources and use Blue Matador’s automatic setup to effortlessly watch for anomalies and errors with Kinesis.