With the recent panic over the zero-day Kubernetes vulnerability CVE-2018-1002105, Kubernetes administrators are scrambling to ensure their Kubernetes clusters are upgraded to a version that is patched for the vulnerability. As of this writing, the minimum versions that have the patch are 1.10.11, 1.11.5, 1.12.3, and 1.13.0-rc.1.
If your cluster is managed by your cloud provider (e.g. Amazon EKS, Google Kubernetes Engine), you will receive updates as they are made available. For those of us managing our own clusters, there are several ways to upgrade the Kubernetes version in your cluster. The first way is to upgrade each node individually until the entire cluster has been upgraded. This task is made easier with tools like kops, but can still be time consuming if you are upgrading multiple versions. For help with safely removing old nodes from your cluster, check out this blog post.
Another route to upgrading, which this post focuses on, is to create an entirely new cluster at the desired version and move traffic over. I have used kops to create new clusters on AWS several times, and it saved me hours when upgrading our production cluster to v1.10.11 to patch the vulnerability.
A Note About Kops
My experience with kops is limited to what I’ve needed to do since around June 2017. That includes rebuilding a production cluster several times for zero-downtime upgrades on AWS. I have not used kops on other clouds or on-prem, and have purposely kept my kubernetes clusters created with kops completely separate from the rest of our infrastructure to avoid any possible complications with shared resources such as VPC and Route53 Zones. Read more about all of the features of kops and how to install it here. The rest of this guide will assume you have kops installed, have read through or followed the tutorial, have a kops state store already set up, and are familiar with the AWS CLI or Console. Running the commands in this post will incur charges on AWS, and most of them are not copy-pasteable as-is.
Creating the Cluster
Creating the Kubernetes cluster is obviously the first step. After all, we need somewhere for all of our pods to run before we can remove the old cluster. My experience using kops has taught me a few things about creating a cluster that involve a tiny bit of prep work.
-
Manage the DNS Zone yourself
-
Use an encrypted AMI for the EC2 instances (easy to forget, required in many setups)
-
Do not rely on default options for most things
Route53 Zone
Your Kubernetes cluster will need a Route53 zone in which to store DNS entries for the API server and etcd. Kops allows you to use either a private or public DNS zone, but there have been issues with the private DNS working correctly. Using a public Route53 zone makes it possible that someone can discover the private IP addresses of your instances, but in reality the risk is very low of anything meaningful coming out of it as long as your security groups are set up correctly (also consider that any internal Classic ELBs already expose this information). Once your zone is created, just get the Hosted Zone ID.
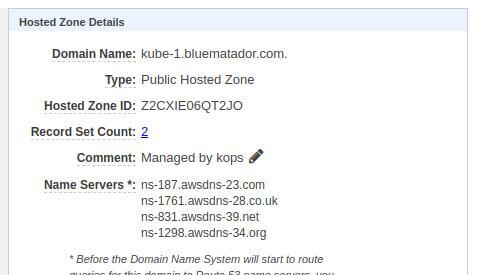
Hosted Zone Details
If your new hosted zone is a sub-domain of another zone, you have to do one more step. You have to delegate DNS to your newly created zone. This can be done by creating an NS record in the parent zone (in our example, that would be bluematador.com) with the name servers of the delegate zone (kube-1.bluematador.com) as the values.
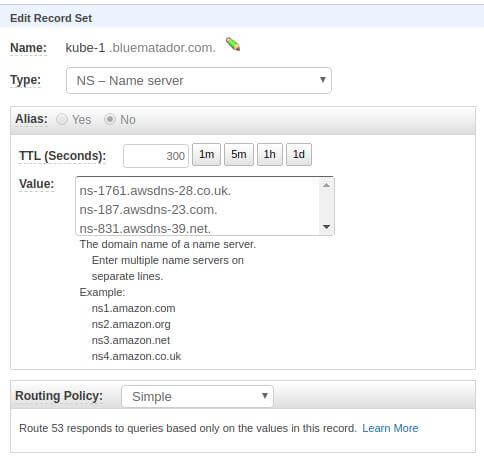
The nameservers from the kube-1.bluematador.com zone are the value of an NS record in the bluematador.com zone
Encrypted AMI
The team at kops provides many pre-tuned AMIs for your Kubernetes nodes to run on. Unfortunately, public AMIs are not encrypted, and having encrypted root devices (which are created from encrypted AMIs) is a hard requirement of many systems. Your choices are to create your own AMI using one of the supported operating systems and encrypt it, or create an encrypted copy of one of the kops AMIs in your account. Since the goal is to quickly get a Kubernetes cluster set up, we will copy one of the kops images.
This can easily be done by searching for the AMI you need in the EC2 Launch Instance wizard in the region your cluster will be in. For this example we will be using the k8s-1.10-debian-jessie-amd64-hvm-ebs-2018-08-17 image in us-east-1, which has the id ami-0d9904e9e879910d6.
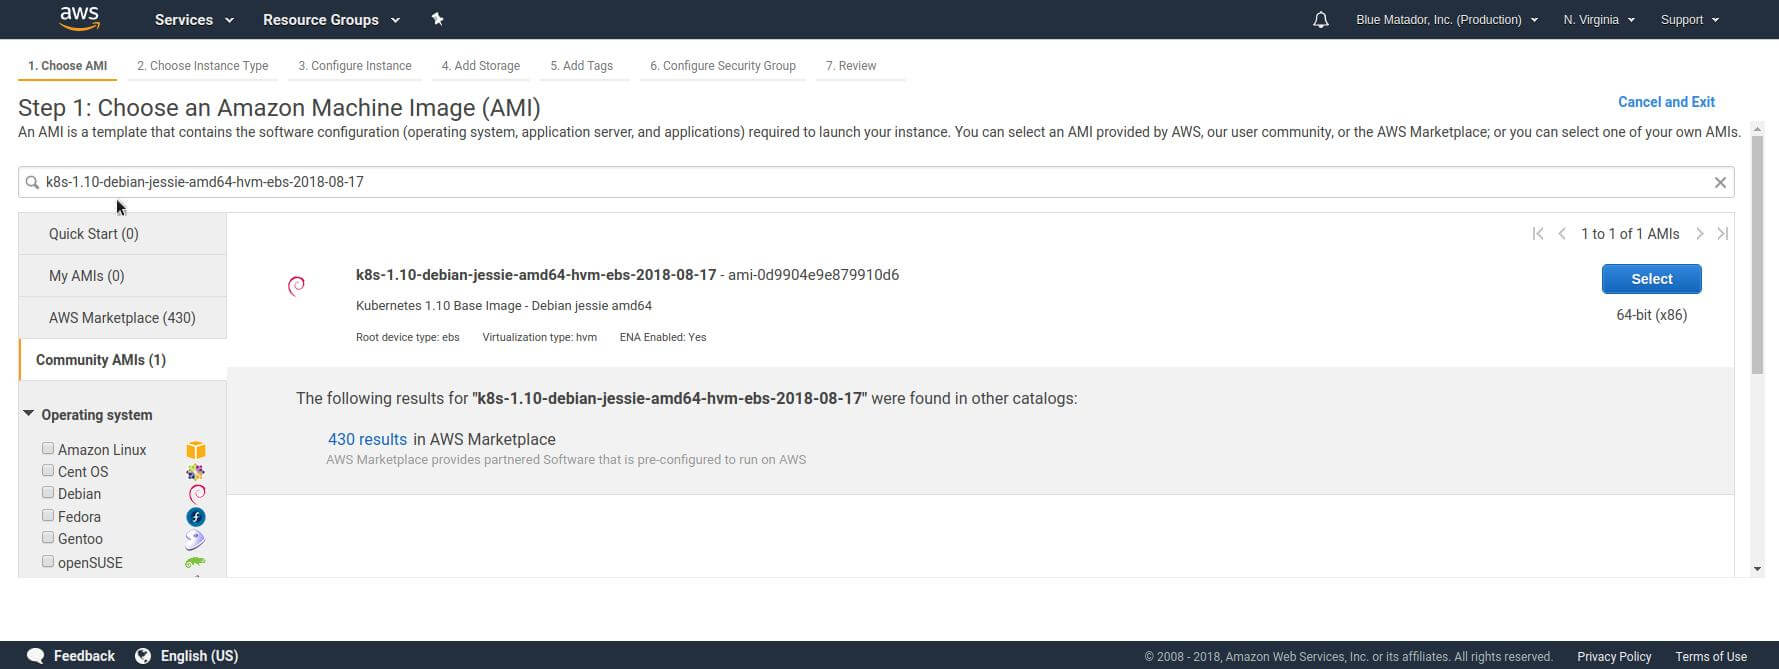
Getting the AMI ID
With the correct AMI id, we can now run a quick command to encrypt and copy it to our account.
aws ec2 --region us-east-1 copy-image --encrypted --name k8s-1.10-debian-jessie --source-image-id ami-0d9904e9e879910d6 --source-region us-east-1The result will be the new image id of the encrypted AMI in your account. It may take several minutes for the image to be ready in your account, but you can continue the setup while this is happening in the background.
Configuring The Cluster
Now that we have our Route53 zone and encrypted AMI, we are ready to actually run the kops command to create a cluster. The kops documentation has an exhaustive list of every option when creating a cluster, but I will also briefly explain some of the options as needed. Here is the full command:
kops create cluster \
  --cloud aws \
  --topology private \
  --associate-public-ip=false \
  --encrypt-etcd-storage \
  --network-cidr 10.3.0.0/16 \
  --dns public \
  --dns-zone ${ROUTE53_ZONE} \
  --image ami-0dea9ab3061650568 \
  --master-size c4.large \
  --master-count 3 \
  --master-zones us-east-1a,us-east-1b,us-east-1d \
  --master-volume-size 64 \
  --zones us-east-1a,us-east-1b,us-east-1d \
  --node-size m4.large \
  --node-count 6 \
  --node-volume-size 128 \
  --ssh-access 10.0.0.0/16 \
  --ssh-public-key ~/.ssh/id_rsa.pub \
  --kubernetes-version 1.10.11 \
  --networking weave \
  ${CLUSTER_NAME}
The cloud, topology, associate-public-ip, and encrypt-etcd-storage options all basically just say to create the cluster in a VPC within AWS where the instances are not publicly accessible and etcd is encrypted (a no-brainer, really). There is very little reason to create a cluster in a public topology in AWS when you can use ELBs to give public access to parts of the system afterwards.
The network-cidr option allows you to specify the IPv4 CIDR block for the VPC that kops will create. The only requirement is that it does not overlap with one of your existing VPCs.
The dns-public and dns-zone options should be populated according to the decisions we made in the Route53 Zone section of this article. Make sure to either set the environment variable before running the command, or put the actual Hosted Zone ID in its place.
The image, master-size, master-count, master-zones, master-volume-size, zones, node-size, node-count, node-volume-size options all control how your actual Kubernetes nodes will be configured in EC2. The image is the AMI id for the encrypted image that is now in your account. For a highly available setup you will want 3 or more masters and one per specified master-zone. Very large clusters may need more masters and in that case you can do 2 or more per zone. You will likely want to use the same zones for the nodes as the masters. The number of nodes and size of them depends on your workload, and you should have a good idea of what you need based on an existing cluster. The node and master volume size will scale with the size of your cluster, and based on your usage. These do not contain container data that is provisioned through persistent volumes, so can usually be sized just to get enough IOPS for the disks and handle your images and logs. If you are unsure what to set, check what your existing cluster does and copy that, or rely on the defaults.
The ssh-public-key option is critical to administering your cluster later. Kops will create a new EC2 Key Pair using the public key at the specified location. Make sure this is set to a public key you will have access to later, or you will not be able to ssh to your nodes to diagnose issues.
The ssh-access setting is useful when setting up your cluster and verifying that everything is working. It will essentially add a security group rule to your nodes allowing port 22 access from a CIDR range. If you have a bastion host or public IP you are connecting through, you can put that here. You can also edit the cluster later to remove this access when everything is verified.
Finally, the kubernetes-version and networking options control the actual kubernetes software. Currently the only version that is patched for the vulnerability and also supported by kops is 1.10.11. The networking option is up to you. I prefer weave because I haven’t had issues with it. I imagine there will be a day where I switch to calico, flannel, or some other CNI because it has a feature I need. For a full list of the options here, checkout the kops networking documentation.
The final argument in the command is the name of the cluster. I usually just use the full domain name for the Route53 zone it will run in, e.g. kube-1.bluematador.com. The choice is yours.
Creating The Cluster
Now that every option is set, run the kops create cluster command. Kops will validate that all the settings make sense, and that DNS is set up correctly before actually creating resources. It also tells you every resource that will be created or modified. To actually create the cluster, run the following command:
kops update cluster --yes ${CLUSTER_NAME}
Now kops will create the VPC and all associated resources for your cluster. Run kops vaildate cluster ${CLUSTER_NAME} to see the status of your cluster. For the first few minutes of setup you may get an error like “unexpected error during validation: error listing nodes: Get https://api.kube-1.bluematador.com/api/v1/nodes: EOF” before the masters are set up. Wait a few minutes and try until you get output like this:
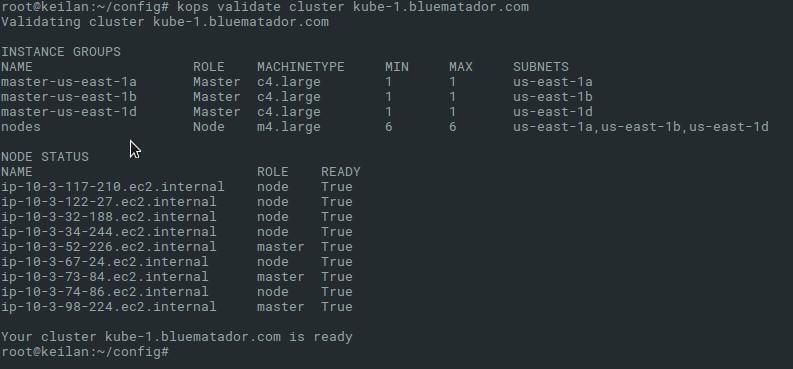
kops validate cluster output
Use Your New Cluster
At this point you have successfully used kops to create a new Kubernetes cluster that is upgraded to version 1.10.11. Now you can begin moving over your workload to the new cluster as you see fit. You can configure kubectl to access your old cluster using kubectl config get-clusters and kubectl config set-context to help with the transition.
Kops is great at managing the infrastructure that Kubernetes runs on, and it is now on you to integrate that with the rest of your infrastructure. Since this process created many resources without much input, there are several AWS-specific things you will likely need to configure in order to actually move your production workload to the new cluster. Here is a list of some common actions to take with a new kops cluster:
-
Peer the VPC. If you have another VPC that needs access to/from the new VPC, create a peering connection and accept it, and update your route table entries to allow access in both VPCs.
-
Attach IAM policies. It is very common for pods running on your cluster to need access to some sort of other AWS resources. Do not forget to attach policies to the IAM roles created by kops and attached to your nodes. They follow the naming convention of “nodes.${CLUSTER_NAME}”
-
Set up Endpoints. If your application accesses DynamoDB, S3, or other AWS services you should investigate using VPC Endpoints in the new VPC. You may have had them in your old VPC and forgot about them, but they can save on latency and cost in many cases.
-
Set up monitoring. It is easy to forget to bring over your monitoring tools when moving to a new cluster. Remember to get them up and running ASAP to identify any issues with the new cluster. Check the documentation for your tools to make sure the version you are using is compatible with the newer version of Kubernetes.
-
Double-check security. If you have an eye for security, you will want to verify that the kubernetes API is only accessible from your private network, and that none of your nodes are publicly accessible. Don’t leave this step to the pen testers.
-
Switch DNS over. Many applications use a set of DNS entries to control actual production traffic. Once you have migrated your workload to the cluster, do not forget to actually switch traffic in Route53 to the newly created ELBs for your application.
-
Clean up the old cluster. The entire point of creating a new cluster was to patch the hole caused by the old one. After everything has been verified in production and moved over, make sure to clean up the old cluster and ensure there is no way that the security hole can be used against you. Even using the old cluster for dev is not recommended if it is on a vulnerable version of Kubernetes.
Conclusion
Creating a new cluster as a method of upgrading Kubernetes can be a long and painful process if you do not know what you are doing. At the same time, it may be your only option for workloads where the possibility of disruption must be minimized, or if you are several major versions of Kubernetes behind. In any case, you can consider it an exercise in understanding how your cluster is configured and as a test for the next time you need to quickly move your production workload (DR anyone?).
If you are interested in automatically monitoring your new Kubernetes cluster without any configuration, check out the list of Kubernetes events that Blue Matador covers, and start a 14-day trial.